Thursday, December 27, 2012

Orange and Roasted Garlic Shrimp Skewers

Well, I must first start off with an apology on leaving the blog behind for awhile. So much has been going on that I never got a moment to sit down and blog. I missed it. A lot! So, I am very, very sorry.

With Christmas 2012 now behind me and a new year right around the corner, I have been reflecting on what a wonderful year 2012 was. Some of our 2012 highlights were: Todd graduating physical therapy at Hennepin County Medical Center with a 100% recovery from his motorcycle accident last spring, the business getting busier and busier, the birth of our beautiful niece Hadley in March, the wonderful get-togethers with our close friends and family, the "trip of a lifetime" to Alaska with Todd's family, and a wonderful holiday season! We are truly blessed.

As I say goodbye to 2012, I am embracing all the wonderful things that are sure to happen in 2013. In 2013, I will say goodbye to my twenties, focus harder on my business, and spend much more time with my family. Todd and I have many plans this year... and a lot of them begin in the kitchen!

Now, for a nice and light recipe to help you  get back on track after a wonderful Christmas splurge.

Orange and Roasted Garlic Shrimp Skewers
Serves: Two (2)

Ingredients:
1 Large head garlic, top sliced off
2-3 Tablespoons good olive oil, for drizzling onto garlic.
Salt and freshly ground pepper
2 cups orange juice
1 tablespoon crushed red pepper, optional.
20 large uncooked shrimp, peeled and deveined, (reserve shells.)
2 additional tablespoons olive oil, for marinade.
8 wooden skewers, soaked in water
1/4 cup fresh flat leaf parsley, finely chopped

Directions:
Preheat your grill to high.  Place garlic in the center of a piece of aluminum foil, drizzle with 2-3 tablespoons olive oil, and season with salt and pepper, to taste. Place on grill, and roast for 30-40 minutes, or until garlic is soft.

Squeeze roasted garlic into a bowl. In a small saucepan, bring orange juice and 1/2 of the reserved shrimp shells to a boil and cook until the orange juice has reduced to about 3/4 cup. Strain the reduced orange juice into a blender and add the roasted garlic, crushed red pepper, and additional 2 tablespoons of olive oil and blend until smooth. Let cool completely.

Place shrimp in a large baking dish, pour the orange/garlic marinade over it and toss to coat. Marinate in the refrigerator for at least 1 hour.

Thread 5 shrimp onto wooden skewers, season with salt and pepper to taste and grill over high heat for 2-3 minutes per side, or until cooked through. Remove to a platter and sprinkle with chopped parsley.


*Variation: In lieu of grilling shrimp and/or garlic, heat oven to 400°F and bake. The garlic can be prepared and baked the same amount of time and so can the shrimp!

I wish you all a wonderful holiday season and a beautiful start to your new year!


Source: A slightly modified version of Bobby Flay's, seen here at Food Network

Wednesday, November 28, 2012

Monday, November 19, 2012

Thansksgiving: The Menu

Thanksgiving. 

It's almost here... and I couldn't be more excited about it. Let's face it, a gluttonous day spent eating, drinking, and laughing amongst family is just pure awesomeness. 

This year, I have a bit of a heavy heart about hosting. Although I adore everything about hosting... from the table decor to the menu planning, I have never hosted a family holiday. Every year we have always gone to my parent's house where my mother strides through the menu and makes it look effortless and easy. My father then enters the room with his carving knife and gets to work while all of the kids gather around the table and tell stories, sip wine, and laugh over a beautiful meal. This year my folks have decided to spend the latter part of November out gallivanting and traveling Nevada since they are now both officially retired... and I am elated for them. They will, however, certainly be missed.  It is in their honor that I host this year. So, here's to you Mom and Dad; I am so thankful for you!

Thanksgiving Day Menu

Starters:

Cranberry Pomegranate Mimosas
I love any get together where it is socially acceptable to consume champagne at noon. 
What better way to great your guests as they arrive? The original orange recipe tastes good, but this little holiday twist looks delightful, doesn't it? The complete recipe can be found at: My Life as a Mrs.
Photo Source: My Life as a Mrs.
Antipasta Platter
This really doesn't really consist of any one recipe. It's cured meats, olives, fresh mozzarella, and a few veggies nicely spread onto a serving tray. Let's face it, there will be more than enough food going around, so a nice light little snack is more than enough.

Photo Source: My Recipes
Main Course: 
Turkey (Duh.)
We are going with the classic ole' bag method. Rinse turkey, rub it with butter, salt, and pepper. Stuff it, throw it in the bag, and cook it... low and slow! Nothing crazy here, just the classics. For tips, tricks, and information, you can look at the Reynolds Oven Bag website.


Roasted Garlic Mashed Potatoes: 
Again, nothing fancy, but full of flavor. Gee, guess who's recipe!? Yup... Martha.
The next one is hers too! For the full recipe, go here.

Photo Source: Martha Stewart Living

Sausage and Wild Rice Stuffing:  
I am jazzing up my stuffing this year. I love the classics, but wanted one dish to play with and that dish was stuffing. I decided to make it even more unhealthy by adding sweet Italian sausage. Sausage makes everything better. Although I know i won't follow the recipe exactly, I am basing it off of one I found at Epicurious Here is the one I will use as my base.

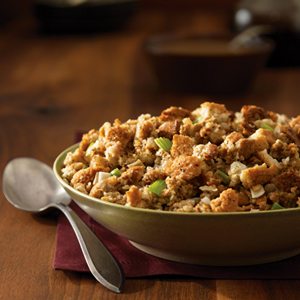
Moist & Savory Stuffing
Photo Source: Pepperidge Farm
 Cranberry Sauce with Cognac:
I had you at cognac, didn't I? Martha Stewart does it again! Her recipe is here

Photo Source: Martha Stewart Living
Green Bean Casserole:
This year, I am going to make a home-made version and leave the Campbell's soup version behind. I am not ashamed to admit that I love that version, however, I have some help on the desserts this year, (more on that in a bit,) so I will have a little more time to give to my green beans. I originally saw this on Annie's Eats, and if she made it and posted it... then it turned out good. The full recipe can be found above at Annie's Eats, or here at William Sonoma.   

Photo Source: William Sonoma
Roasted Sweet Corn:
Sweet, easy, and delicious.
Full recipe is at Sweet Life.

Photo Source: Sweet Life
Sweet Potato Casserole: 
My sister-in-law Anna has had her eye on this recipe for quite some time. She offered to make this to bring to the feed and I pleasantly accepted. It's a Barefoot Contessa recipe, so it has to be good, right? The Recipe.

Smashed Sweet Potatoes with Apples
 
Rosemary and Black Pepper Dinner Rolls:
Soft, pull apart rolls are a MUST. 
The recipe I will be using is here at the Confections of a Foodie Bride blog. 

Photo Source: Confections of a Foodie Bride
Dessert: 
 You were waiting for this part, weren't you!? And I made you go through all that other stuff first! I am so mean, I know. This year, I got out of making dessert because both of my beautiful sister-in-laws offered to make it for me. I was more than pleased to take them up on that offer as I knew it would alleviate time off of my hands, but most importantly because they are wonderful bakers. 

Cranberry Cake:
So delicious. Yet again... Barefoot Contessa!

Photo Source: Barefoot Contessa
 Classic Pumpkin Pie: 
Nothing says Thanksgiving like Pumpkin Pie. Classic and tasty. 
This is one tradition you can't break! 

Classic Pumpkin Pie
Photo Source: William Sonoma
There you have it! That's everything we are putting on the table this year! It is going to be quite a meal! What are some of your favorite Thanksgiving recipes, meals, and dishes? I would love to see!

Have a wonderful, fun, and SAFE Thanksgiving this year.
Love,
Kristen

Monday, November 12, 2012

Prosciutto, Boursin, and Crescent Wrapped Asparagus Bundles

I am truthfully not sure how this didn't make it to the blog sooner as it is one of my oldest, most loved, and most requested appetizers. They are fast, easy, and delicious... all the things appetizers should consist of.   I made these for the boys yesterday along with a few other appetizers. Every single one was gone!

Prosciutto, Boursin, & Crescent Wrapped Asparagus Bundles
Serves: Twelve (12)


Ingredients: 
One (1) bundle of asparagus; washed and trimmed.
Half of a 5.2 ounce package of Boursin garlic and fine herb cheese
One (1) 3.0 oz. package prosciutto
One (1) package crescent rolls

Directions:
Preheat oven to 375°F.
Wash and trim asparagus to approx 4 inches each.
Remove crescent rolls from package and cut each pre-cut roll in half.
Remove prosciutto from package and cut each slice in half lengthwise.
Take three asparagus spears and tightly wrap with a prosciutto slice. Add a dollop of Boursin cheese to the top of the wrapped bundle. Now, take the widest side of the crescent roll half and place on top of cheese and wrap all the way around so no cheese is exposed.

Bake for 15-20 minutes.
Serve warm or cold.

Voila! Cheap, easy, but delicious. I have yet to meet anyone who doesn't love these.

To make for a large party, double recipe but only buy one 5.2 oz. package of Boursin cheese.
They make for great party food, and the bonus? You can assemble them ahead of time and pop them in the oven 20 minutes before your guests arrive!

Want to make it vegetarian? Skip the prosciutto! It's still a decadent and delicious treat! You won't even miss it! 

Stay tuned this week for my "What's on the menu" post for Thanksgiving!
-Kristen 

Tuesday, October 23, 2012

(Lightened Up) Potato Cakes

Growing up, my father was always the breakfast man in the house. Every Sunday morning when I woke, I was greeted with an aroma of fresh coffee, eggs, and bacon.  On occasion, he would change things up and make an egg bake, pancakes, french toast, or my all time favorite: German potato pancakes. If you haven't had this classic German dish before, I strongly suggest keeping an eye out for them on a breakfast menu somewhere and giving them a shot. I eat mine with sour cream on top, but you, of course could do whatever your pretty little heart desires.

To this day, I cannot perfect my father's recipe. Every single time I try it's a complete disaster! In fact, each time I make them, I tell myself, "This is it. You're going to get it this time." Then it turns ugly and I pack away the recipe until I can conjure up enough courage to try it again. If you're feeling frisky, you could always try to make them yourself. This recipe at Epicurious is similar to the one my dad follows.

Until I get that traditional recipe under wraps, I have found the non-traditional recipe below. It's a bit heartier and thicker,  but it is outright delicious none-the less.


(Lightened Up) Potato Cakes 
Serves: Eight (8)

Ingredients: 
3 slices reduced fat, center-cut bacon, chopped (optional.)
3 large yukon gold potatoes, peeled and cut into 1-inch pieces (approx. 2.5 Lbs.)
4 garlic cloves, chopped
1/4 cup plain low-fat Greek yogurt
1/4 cup reduced-sodium chicken broth
3/4 teaspoon salt
1/2 teaspoon pepper
1 1/4 cups plain panko bread crumbs
1/2 cup reduced-fat shredded cheddar cheese
3 scallions, finely chopped, (optional.)

Directions:
Preheat oven to 425°F

Cook bacon until crispy and chop into medium to small sized pieces.

Place the potatoes and garlic in a large pot and cover with water; bring to a boil. Reduce heat and simmer until potatoes are fork tender, about 20 minutes; drain. Return the potatoes and garlic to the pot and mash with yogurt, broth, salt, and pepper, until smooth.  Stir in 1/2 cup panko, the cheese, scallions, and bacon. Shape into eight (3 inch) patties. Place the remaining 3/4 cup panko in a shallow dish and dredge the patties into  the crumbs.

Place patties onto a baking sheet lined with parchment paper. Bake for 10-12 minutes or until golden brown. Turn over each patty and continue cooking an additional 10-12 minutes. Both sides should be golden brown and crispy, but cooked through.

Serve warm.

Make it vegetarian and skip the bacon!

Serving suggestion, as seen in above picture:
Toss arugula in one tablespoon of honey mustard and top potato cake with mixture and an over easy egg.

Source: Slightly modified version of Bobby Deen's Lighter Smashed Potato Cakes

Tuesday, October 16, 2012

SodaStream: My favorite new gadget

I try very, very hard to NOT to be a gadget person. I hate clutter and unnecessary kitchen items. My philosophy is a more, "back to basics" approach. You don't often hear, " I have to have that," come out of my mouth when it comes to the latest and greatest kitchen gadgets.  That however, did not apply to the Sodastream. I had to have it. HAD TO! The pros were obvious. I would no longer have to:
  • Drink a diet soda loaded with aspartame (my number one priority.)
  • Haul it
  • Buy in bulk, (when I saw a good sale this was common.)
  • Store it
  • Haul garbage bags full of empty cans to the recycling landfill.
I am sure what you REALLY want to know is does it taste good? I worried a little too.  I'm a  girl who can tell the difference between a Coke and Pepsi so I wasn't sure if this would fly in our home. I thought it was perfect, but knowing Todd's adoration of diet coke, I knew his opinion would be the deal breaker. One night, I nervously poured him a glass of the Sodastream diet coke and patiently waited for his response and doubted that he would like it. To my astonishment, he LOVED it. I too, was immediately hooked. In the last three months, I have purchased the diet coke, coke, coke zero, diet pink grapefruit (my favorite,) diet lemon lime, diet ginger ale, and used it just as soda water. All of them have been great and taste just like the main brand named sodas, if not better!

Here's how it works:
You can purchase a starter kit for  $59.99-$79.99 depending on which model you prefer. (They are usually marked higher than that, but don't pay full price as they are always on sale.) In the starter kit, you receive a  C02 tank, the re-usable 1 liter bottle, the soda maker, and a variety of soda syrups to try.

Many main stream stores like Kohls, Target and Bed, Bath, and Beyond carry the Sodastream sodas. They come in 16.9 oz bottle and that makes the equivalent of 33 cans!

When you run out of a C02 cartridge,  bring it to Bed, Bath, and Beyond and replace it for $15. (Note, you have to tell them it's a replacement. A new one will run you $30.00, but the replacement is $15.00. They usually have the replacements at the register.)

All in all, I LOVE this product. I have ZERO complaints. I no longer have to carry soda in and out of the grocery store and then find somewhere to store it.  My recycling is 3/4 less than it used to be. But the best part? We are no longer consuming diet soda that contains aspartame.


Do you own one? Do you love it? I would love to hear your thoughts!
If you have any questions about it, feel free to ask!

-Kristen


Note: This review is based solely on my own opinion as a consumer and I was not in any way asked by Sodastream to write this, or any store mentioned in this review.


Friday, October 12, 2012

Individual Apple Blueberry Crisps

Apples are so bountiful right now and are all around delicious. A week or so ago, I cut them up, added some blueberries and made a phenomenal low calorie treat. (I am in no way a nutritionist or licensed to tell you that these are in fact healthy, but they seemed that way...)

The best part about this recipe is that they are SUPER easy to make. I am willing to bet that even my friend Krystle can make them and she has a hard time boiling water. (That was only put in here in hopes of a laugh. Love you Krystle!)


Individual Apple Blueberry Crisps
Serves: Six (6)

Ingredients: 
Four (4) large apples, peeled and diced into chunks (I used honey crisps.)
6 ounces fresh or frozen blueberries
2 teaspoons corn starch
1/2 cup crisp topping (to mix in with berries; recipe follows.)
2+ Cups additional crisp topping for the tops of the ramekins; recipe follows.

Crisp Topping: 
5 ounces all-purpose flour; approximately 1 cup
2/3 cup sugar or Truvia
1 1/2 cups graham cracker crumbs
6 ounces unsalted butter, cubed and chilled.

Crisp Topping Directions:
Place flour, sugar, and cracker crumbs in large bowl and combine. Work the butter into the dry ingredients with your hands until it is crumbly. Store in the refrigerator for up to a week and use as toppings for cobblers, crisps, or grunts.

Apple Blueberry Crisp Directions: 
Preheat oven to 350°

Place the diced apples and blueberries into a mixing bowl and add in the sugar, cornstarch, and 1/2 cup of the crisp topping. Stir to combine.

Divide the fruit mixture evenly between six (6) 4.5 oz. ramekins. Divide the remaining crisp topping and top each ramekin with crisp topping. Place the ramekins onto a baking sheet and bake on the middle rack for 30-35 minutes or until they are bubbling and the topping is golden brown.

Allow the crisps to cool before tasting them. (Don't forget to add a scoop of ice-cream on the side... if that's your thing.)

Does this recipe look a little bit familiar? Maybe a tiny bit? It's ridiculous close to this one I posted awhile back!

Friday, October 5, 2012

"Fried" Green Tomatoes

I have been holding off on this recipe because it is another "fried" recipe and I am not usually a "fried" kind of gal. So then, on my second batch, I BAKED them.

Voila!! Now you have a recipe that can be made the healthier way, or the other way. (They were both delicious!)

I must admit, I have long been a fan of the movie with Kathy Bates, but the actual thought of eating fried green tomatoes never appealed to me. This past year I saw them at the state fair and thought, "really!? What is the big deal! " Well, I decided to find out.

The minute I took that very first bite, I knew I was in love. They are scrumptious!! Salty, crunchy, and  slightly sweet!! Todd and I actually fought over the last one. (I won.) 

Get curious and try them!


"Fried" Green Tomatoes
Serves: 2-4

Ingredients: 
3-4 large/medium green tomatoes
1 egg, lightly beaten
1/4 cup buttermilk. (I used 2%)
1/2 cup all-purpose flour, divided
1/2 cup cornmeal
1 teaspoon cayenne pepper, optional
1 teaspoon garlic powder
Salt and Pepper, to taste
Ranch dressing, for dipping

Directions: 
Preheat oven to 425°F

Slice tomatoes in 1/4" slices; set aside

Pull out three shallow bowls. In one, lightly beat egg and buttermilk.
In the second, add 1/4 cup all-purpose flour and in the third, combine the remaining 1/4 cup all-purpose flour, cornmeal, salt, pepper, cayenne pepper, and garlic powder. Stir to combine.

Using a fork, dredge each tomato slice in plain flour first, then in egg mixture, and then in cornmeal mixture.

Place tomatoes on to a baking sheet lined with parchment paper and cook for 10 minutes or until the tops appear crispy. Using a pair of tongs or a fork, flip the tomatoes over, being careful not to pull of the coating. Once all tomatoes are turned over, continue to cook for another 10 minutes, or until golden brown and crispy. Remove from oven and add salt and pepper while hot!

Serve warm with a dipping sauce of your choice, or by themselves!


Alternative Frying Method. 
Heat 1/2-3/4 cup canola or vegetable oil in a dutch oven and heat to 350°F
Once all the tomatoes are dredged in coating, work in small batches and fry tomatoes until golden brown and crispy and place on paper towels to dry. Sprinkle with Salt and pepper and enjoy while hot.

Have a wonderful weekend everyone!!


Thursday, September 27, 2012

Fried Pickles

Fried Pickles. Have you had them? If not, try them. They are delicious.

Todd and I are HUGE fans of the Minnesota State Fair. Every year, on the first opening weekend we wake up really early and head to the fairgrounds, where we meet my brother Tom. We, the hungry threesome, begin our full day adventure by first talking about what is an absolute must stop. Fried pickles are ALWAYS a unanimous vote.

I have often thought to myself, "can it really be hard to fry pickles?" and I always answered myself with a no. However, the breading. The breading could be difficult. Nope, it turns out it was really, really easy.

Don't they look scrumptious!?


So, that being said, here is the recipe:

Fried Pickles
Serves: 2-4

Ingredients: 
Pickles (I used the already sliced Vlasic Ovals, but you can slice them if that's your thing.)
1/2-3/4 cup canola or vegetable oil, for frying
1 egg, lightly beaten
1/4 cup buttermilk. (I used 2%)
1/2 cup all-purpose flour, divided
1/2 cup cornmeal
1 teaspoon cayenne pepper, optional
1 teaspoon garlic powder
Salt and Pepper, to taste
Ranch dressing, for dipping

Directions: 
Pull out three shallow bowls. In one, lightly beat egg and buttermilk.
In the second, add 1/4 cup all-purpose flour. In the third, combine the remaining 1/4 cup all-purpose flour, cornmeal, salt, pepper, cayenne pepper, and garlic powder. Stir to combine.

Pour oil to a depth of 1/4 to 1/2 inch in a large skillet; heat to 375°.

Using a fork, dredge each pickle slice in plain flour first, then in egg mixture, and then in cornmeal mixture. Drop into hot oil. Working in batches, cook 3-4 minutes on each side or until golden brown and crispy. Drain on paper towels or a rack and sprinkle with salt.

Tip:
These could easily be fried up ahead of time and re-heated later on for a great crowd-pleasing appetizer. Just bake at 350°F for 10-15 minutes!

Additionally, the breading is just a base. Add in any additional spices that tickle your fancy... and then tell me about them!

Source: A modified version of My Recipes

Wednesday, September 19, 2012

Home-made French Fries (+ GIVEAWAY Winner Announced!)

First and foremost,
A big thank you to everyone who submitted an entry in The Little Bitchin Kitchen's first giveaway in honor of our one year anniversary.

Secondly, congratulations to Laurie, who followed all of the entry directions and was excited to make her first ever batch of sugarless fig jam! (I am actually dying to know how that turned out, so Laurie, if you want to share your recipe, please do!) I will contacting you soon for shipping details. I hope you enjoy the Barefoot Contessa cookbook as much as I do!

Now, for some good grub:

Last Sunday was a day of rest at our house. Most of it was spent re-cooperating after a night out to celebrate my  friend Krystle's birthday.  Let's just say that shots, mixed drinks, and late nights are not as easy to bounce back from these days!

In addition to being a wee-bit under the weather, it was football Sunday and what better excuse to indulge a little, right? These golden fried fries complimented my mushroom and swiss sliders wonderfully.  I guarantee you will love them, that is, if you try them. (So try them!)

Home-made French Fries
Serves: Four (4) as an appetizer, Two (2) as a side dish

Ingredients:
Four (4) medium sized russet potatoes
One (1) teaspoon kosher salt
One (1) lemon
Vegetable or canola oil, for frying
Seasoning salt or kosher salt, (to taste,) after frying

Directions:
Peel and rinse the potatoes thoroughly. Now, cut them into sticks by cutting the potato in four or five vertical pieces, then cutting each piece into sticks. (I prefer mine to be about 1/2 inch in thickness, but thicker or thinner is your preference.)

Add your cut potatoes to a large bowl of cold water and add one (1) teaspoon of kosher salt. Squeeze the juice of one (1) lemon over them, making sure to catch the seeds, and then toss the lemon into the bowl too!

Let the potatoes soak for a minimum of 2 hours, but no longer than 24 hours.  I prefer a little longer, but 2 hours will be just fine!

Remove potatoes from the bowl and discard water and lemon. Place potatoes on a baking sheet lined paper towels and pat dry.

In a dutch oven, heat oil to approx. 300°F degrees.  If you have a thermometer, use it!
300°F is ideal, but you could get by on medium/high heat. You just don't want them turning brown and crispy... yet. If they are turning brown within the first 4 minutes, turn your heat down.

Next, in batches, add your potatoes to the oil and par-cook for about 5 minutes per batch, or until potatoes are soft. Remove each batch and return to baking sheet lined with new/dry paper towels.

Once all potatoes have gone through their first batch of frying, turn up the heat to 400°F. When the oil is hot, start to fry each batch again, this time until each batch starts to get perfectly golden brown and crisp around the edges. Remove from the oil and set on new/dry paper towels and sprinkle with a seasoning salt or kosher salt.


You just put restaurant fries to shame. Seriously... how good do they smell right now? Get out some ketchup and chow like no one's watching!

Source: Slightly adapted from: The Pioneer Woman Cooks.

Thursday, September 13, 2012

Our first anniversary and a GIVEAWAY!

Happy Birthday to me, Happy birthday to me! The Little Bitchin Kitchen is 1!

One year ago I set out on a entrepreneurial journey to own my own business, start a food blog, and have some fun in my kitchen... for a living.  We have had some great successes in the first year and have high hopes for the years to come! I have lots coming this year, so please stay tuned!

In honor of the first Little Bitchin Kitchen anniversary, I am happy to announce that I am offering a giveaway to say thanks to those who have supported us in the first year!

This is one of my very favorite cookbooks.  I enjoy it for its simple and basic, yet wonderful and delicious dishes.  In fact, some of my favorites from this book include the grilled steak and arugula and the pink grapefruit margaritas!

So here it is:

Here's what you need to do to enter for a chance to win it:
  1. Head over to our Facebook page and hit "like."
  2. Next, follow us! Sign up to follow us via e-mail, subscribe, or follow us via Google connect! (You can do all of that in the right hand column.)
  3. Lastly, leave me a comment below and tell me what you are most excited to cook or bake this fall!
If you already like our Facebook page and follow us, then just head to #3!

That's it!
The contest will end this Saturday at midnight. The winner will be chosen at random and announced on
Note: This giveaway is not sponsored, this is just a cookbook I enjoy and want share.

Thursday, August 30, 2012

Ranch Pasta Salad

Do you ever get sick and tired of the same old side dishes you serve with meals? ME TOO!

Over the summer we have held quite a few fabulous barbeque's, but sometimes, I feel like I serve the same old things at every event or outing.  The Italian pasta salad,  potato salad, coleslaw, chicken salad, tuna salad... I know you know what I mean.

Every year by the end of summer I am completely bored with grilling and the side dishes that accompany those burgers and brats. Last time we had we had friends over, the temperature reached to nearly 100°F degrees. I wanted something nice and light, but heavy enough to fill up our guests. I also didn't want to go back to the store!  I searched the pantry and fridge and came up with this super easy ranch pasta salad.

Now days, Todd asks for this all the time. You have to appreciate simple, easy recipes that taste good! Oh... and I blogged this one just in time for Labor day, because I just knew you would NEED it.


Ranch Pasta Salad
Serves:6-8

Ingredients: 
One (1) 1 Lb. box of rotini pasta, (or any shape you prefer.)
One (1) 16 Oz bottle of your favorite ranch dressing. (I use wishbone.)
Two (2) Cups fresh basil, (or spinach,) chopped in half.
Two (2) 2.5 oz. cans of sliced black olives, optional
One (1)  pint of cherry tomatoes, halved
Salt and Pepper, to taste

Directions: 
Prepare pasta according to the directions on the box. Drain, rinse, and empty into large mixing bowl.

Add coarlsey chopped basil, tomatoes, black olives and ranch dressing. Stir to combine.

Salt and pepper to your liking and serve!

Wasn't that painless?!

Stay safe and have a wonderful labor day weekend!

Wednesday, August 22, 2012

Egg, Prosciutto, and Arugula Sandwich

Hello there! Once again... I am behind on my blog! Sorry about that.

I must admit, this summer has gone incredibly fast. I am just not sure where time goes anymore! In fact, I never even posted about our wonderful trip to Alaska because before I knew it, life went on to the next big event. Thankfully, things are slowing down a bit more and I am getting back into the routine of things. By that I mean cooking.

Truth be told, I have fallen into the "just throw something on the grill" routine, and am not feeling all that guilty about it. Sweet corn was recently in full swing and I literally ate it with every meal for almost a month. There is nothing better than fresh sweet corn on the grill! Not to mention shrimp, chicken, the massive amounts of halibut we shipped back from Alaska, brats, burgers... it all tastes wonderful and doesn't need much but that good charcoal flavor. We live for our summer grilling months here in Minnesnowta.

Last weekend, however, I woke up and felt inspired to COOK something "different" for breakfast. I am so incredibly bored with scrambled and over-easy eggs. Instead, I craved something with much more flavor. I hit the internet and then... out of nowhere... this beautiful dish stood before me and I knew I had to have it and have it NOW!

So simple, yet so divine!

I really, really, really hope you try it and love it as much as Todd and I did.


Egg, Prosciutto, and Arugula Sandwich
Serves: Four (4)

Ingredients: 
Two (2) English muffins, cut in half
1 tablespoon butter
Four (4) slices prosciutto
Four (4) eggs
One (1) cup fresh arugula
Salt and pepper, to taste
Extra-virgin olive oil, for drizzling
1/4 cup white vinegar, for poaching

Directions: 
Bring a medium pot of water to a rapid boil and stir in vinegar.

Meanwhile, in a non-stick frying pan, lightly fry prosciutto over medium heat until browned and slightly crispy, about 4-5 minutes. Set aside.

Now, to poach your eggs. Crack one egg at a time into a small bowl. When your water/vinegar has reached a rapid boil, gently slide the egg into the water. Repeat with the other egg. Allow the eggs to cook for about 2 minutes. The yolk should still be runny, but the whites should be set. Remove each egg from boiling water with a slotted spoon onto a tea towel to remove excess water. Poach the remaining two eggs. (If poaching eggs intimidates you, don't panic! Remember, it may take a bit of practice, but you WILL get it down pat after a few beginner's mistakes. Here's a great tutorial by Alton Brown on Serious Eats to help you through it.)

Lightly toast and butter each half of your English muffins. Top each half with a handful of arugula and one slice of crispy prosciutto.  Top each with a poached egg. Add salt, pepper, and drizzle with your best olive oil.


Voila! Easy, right? Now, make a mess out of that thing!

Source: Adapted from Versus from my Kitchen; a Curtis Stone Original

Tuesday, August 7, 2012

Some of My Favorite Things

I have been insanely busy lately, (who hasn't been, right?) I truthfully haven't even had time to bake or cook! This is rare for me as I ALWAYS find time to cook, but lately my kitchen is lacking a workout, (and so am I.)  Fortunately, I have a freezer stocked with soups, pastas, and other things that have been holding us over until I can get back into my original routine.

Today though, I thought it would be fun to take a moment and share some of the things in my kitchen that I couldn't live without.

Note: I am in no way paid for endorsing any of the products below... I just have them and really like them.

#1 - My Dutch Oven


I really want to get rid of every single other pot in my house. Whether big or small, this thing does the trick! So why have 15 different pots? (The only reason I can think of is because you spent a lot of money on them!?) Once you get one  of these babies you will find yourself utilizing it in all sorts of ways! You can spend anywhere from $30.00 to $199.00 but in all honest they work the same. Save yourself the cash and go middle of the road like we did, and try out Martha Stewart's line from Macy's. 

#2 - A Pizza/Grilling Stone


I love pizza! Nothing tastes better than making it from scratch! This versatile stone can be used for making pizza but also can be used to cook vegetables, seafood, poultry and pretty much anything you can think of! The best part... do them on the grill or inside! I got mine at Sur La Table for a little more than $50.00, but I am sure you could find one cheaper!

#3 - Joseph Joseph Rocker Garlic Crusher


There is nothing better than fresh garlic. And even I, (the usually patient cook,) sometimes get irritated with peeling, chopping, and then chopping again and again. Forget it! This little gem makes it a cinch! Again, a Sur La Table trip well worth it. I LOVE that store!


#4 - The TRU Triple Slowcooker


There is absolutely nothing better for warming and serving at your next party. Recently, I hosted a party where I did a taco bar and used this for a trio of chicken, beef, or shrimp taco options and it was perfect! I am already gearing this puppy up for football season!! This I got at Kohls with one of my fabulous 30% off coupons.
 
#5 - A Salt (and Pepper) Pig


I gave up on salt/pepper shakers and grinders awhile back. Nothing got more annoying. While cooking a meal, I don't want to turn a grinder 47 times to get a tiny amount.... I want to lavishly put it everywhere! I threw them out and got a salt (and pepper) pig instead. Now, I just grab it and throw it all over. LOVE. This item is again from Sur La Table... but I am sure any cooking store has them!

There ya have it! Those are just a few of my favorite items in the kitchen. What is your favorite item? The one thing you can't live without?

Have a great day in the kitchen!
Kristen

Tuesday, July 24, 2012

Blueberry Banana Muffins

Hey there. It's me. It's been awhile.

I took a "super quick transition to a new website that became a painfully long and frustrating  experience," type of break from blogging in hopes of a new and improved website. The only thing that happened was... well, nothing. My recipes, however, are in no need of improvement. The website... eh, we'll get there someday.

I am done trying to be all tech savvy and  have learned that the IT world is nowhere near as exciting as my kitchen.  In fact, there was a short period of time I started to re-think my college degree and wondered if the computer/IT world was what I should have done. Nope, that little miserable experience ensures me I was not meant for that field!!

To end this Tuesday and get back on track with my blogging, I am offering up these beautiful blueberry banana muffins as an "I'm sorry," for leaving everyone behind. I hope you enjoy how easy and wonderful they are.

Ahhhh... it's good to be back!

Banana Blueberry Muffins
Makes: Twelve (12) Muffins

Ingredients: 
3 large ripe bananas
3/4 cup Sugar
1 egg (whisked)
1/3 cup butter (melted)
2 cups blueberries
1 teaspoon baking soda
1 teaspoon baking powder
1/2 teaspoon salt
1 1/2 cups all-purpose flour

Directions: 
Preheat oven to 375°F and grease 12 muffin tins or line them with baking cups.

Combine baking soda, baking powder, salt, and flour in a separate bowl, mix together, and set aside.

Mash bananas in the bowl of an electric mixer fitted with the paddle attachment, for about 1 minute.
(Mashing them with a fork in a mixing bowl will work just as fine too!)

Add the sugar and egg, mix for 30 seconds on low speed. Add in melted butter and blueberries until combined. 

Slowly add in dry ingredients to the banana mixture until all is incorporated.

Pour into prepared muffin tins and bake at 375 for 20 minutes, or until toothpick entered into the center of the muffin comes out clean.


Source: DebM at Food.com 

Friday, June 8, 2012

Ham Hash with Eggs

Sundays at home are one of my favorite days. I have always been a “Sundays are for rest” kind of gal and the only thing I ever commit to doing on this day is making breakfast. Todd and I usually watch an early morning Sunday movie and indulge in a heavy breakfast.

About two weeks ago, we had a ham for dinner and the large amount of left-overs was overwhelming. Todd normally makes ham bean soup, but being that summer was just around the turn, soup didn’t sound inviting. Corned beef hash was always a favorite of mine growing up and I thought to myself, “Why not make it with ham?” Then I did.

I loved it.

It was SUPER spicy, (because I wanted it that way,) and left me feeling warm and fuzzy inside. The asbolute best part of hash is that it’s just a combination of ingredients you have on hand… skip items as you go and add in whatever others you like. You’re driving this car, so go a little crazy!

Ham Hash with Eggs (Sunny Side Up)
Serves: Six (6)

Ingredients: 
Two (2) tablespoons olive oil
One (1) tablespoon butter
Four (4)  small potatoes
One (1) red bell pepper, chopped.
Two (2) stocks celery, chopped.
One (1) Jalapeno, finely chopped.
One (1) vidalia or yellow onion, chopped.
I clove garlic, minced.
Salt and Pepper, to taste
Red pepper flakes, to taste, (optional)
Two (2) Cups ham, diced
Six (6) Eggs

Directions:
Heat pan over medium/high heat and add olive oil. Add in potatoes, red bell pepper, celery, jalapeno, onions, salt, pepper, garlic, and red pepper flakes. Fry until potatoes are tender with a fork and have nice browning. (About 20 -25 minutes) Here is what that goodness should look like:


Next, add ham and heat until ham is throughout.

Heat a separate pan over medium heat and add butter. Add six eggs. (DO NOT FLIP.) Slowly cook eggs until the whites and yolk reach the desired consistency. Usually this means that the whites are firm and the yolk is thick but not firm but whether you prefer the yolk runny or set is a purely personal preference. You can check the consistency of the yolk by shaking the pan gently and observing how the egg jiggles. With experience, you’ll learn just how long to cook the egg to fit your taste.


Spoon hash onto plate and serve with egg on top.


Have a great weekend everyone!
Kristen

Source: An inspiration of my own!

Thursday, May 31, 2012

Strawberry Balsamic Bruschetta

Over memorial weekend, I finished the last of my yard work "projects" for the summer. All that is left to do now is sit back, entertain, and enjoy the beautiful three months of (usually) wonderful weather that we get here during Minnesota summer.

My favorite place during the summer months is definitely my deck. I grab a cold, crisp glass of Sauvignon Blanc, a pile of magazines, (you know, the ones you subscribe to monthly but don't get the time to thoroughly enjoy until you finally have a free evening six months later,) and grab a seat outside.  I sit, sip, and flip through recipes, entertaining ideas, and fun party decor for inspiration.

As I sipped and flipped one night, I came across this recipe. It was a nice and light variation of the much loved caprese bruschetta. I was immediately intrigued, especially since it was a Giada recipe and I really liked her Blue Cheese and Honey variation. I decided to test this over the past weekend but as usual, made a few changes. I removed the butter and added the Boursin Gourmet Spreadable Garlic and Herb cheese and subbed a sliced baguette in lieu of white bread. I loved it, my company loved it, and as far as preparation... it couldn't get any easier!

Disclaimer: I am in no way employed by or payed by Boursin to plug their product... I just really, really love that stuff!

Strawberry Balsamic Bruschetta
Serves: Approx. 15

Ingredients:
One french baguette loaf, sliced into about fifteen, 1/2" pieces
1/4 Cup Olive Oil
1 Cup diced Strawberries (or any berry or berry medley you prefer)
1 Tablespoon Sugar
One (1) 4.4 oz package of Boursin Gourmet Spreadable Garlic and Herb Cheese*
Gia Russa (or any) Balsamic Glaze, (for drizzling.)
1/2 Cup Chopped, Fresh Basil, (for topping.)

Directions: 
On a baking sheet lined with parchment paper, brush baguette slices with olive oil. Bake for 15 minutes at 350°F pre-heated oven. Remove from oven and allow to cool.

Add diced strawberries and sugar to a small bowl; stir, and let sit for no less than 25 minutes.

Once baguette slices are cool to the touch, spread a dollop of the Boursin Cheese spread on top of each slice. Top each with a spoonful of the strawberry mixture. Drizzle with balsamic glaze and top with chopped basil. Arrange on a serving platter and serve immediately.


Note: (You will only use approximately 1/2 the container of cheese, unless doubling the recipe.)

Source: Adapted from Food Network

Tuesday, May 22, 2012

Chocolate Peanut Butter Layer Cake

I have addressed my issues with keeping sweets in our house many times on this blog before, so I won't bore you with another rant on how wildly obsessed I am with eating an entire pan of cookies in one sitting and then follow it with a nice healthy appetizer to try.  Instead, I will actually share a wonderful cake recipe that I found on another blog and let you be the judge and jury on whether or not you can resist devouring the whole thing in one sitting.  I do however, refuse to be responsible for your guilt and/or stomach ache afterwards. 

As I mentioned in my previous post, I jumped at the opportunity to host Todd's family celebration of May Birthday's this year and what better way to celebrate a birthday then with cake? Finally, a good reason to fall off my "healthy" wagon.

I know what you're thinking when you read this title. You're thinking, "Holy Hannah, that sounds heavy and rich!"  Yet it is not. This cake has a wonderful airy texture and the filling is delightfully thin, fluffy, and not to over bearing on the peanut butter flavor.It's truthfully awesome.

One of my favorite comments when I made this cake was, "SERIOUSLY KRISTEN... THIS CAKE IS TO DIE FOR!" I have never dubbed myself as a "baker" per say, (Most of the time I would prefer to be making "to die for" entrees or pretty yet delightful appetizers,) but I do try.  I always dabbled a little bit but when it came to cakes and pies I was never shy to the boxed mix aisle at the grocery. Thankfully, I have been reading a lot of blog recipes lately and Annie's Eats has AMAZING items that I always want to try. Her blog gave me the courage to skip the box and go home-made!


Chocolate Peanut Butter Layer Cake 
Serves: About Twenty (20)

Ingredients: 

Monday, May 14, 2012

Cucumber Bites with Garlic Herb Filling

Every May, Todd and I get together with his father's side of the family, The Jewetts, and celebrate May birthdays. Todd, his grandmother Audrey, his late grandfather Bill, and his uncle Wayne all blessed this world with their presence at one point in the month of May and once a year we make it a point to all get together and honor their day(s) of birth.

This year, the gathering date fell on Mother's day and gave us all another reason to celebrate!!  I had a ton of new recipe finds that I was DYING to try, so I quickly swooped in and offered to host before anyone else got the chance. The only question was, which of these 100+ recipes that I have scattered throughout blogs, Pinterest, and other websites will I dare to make?!

I knew if I was going to host this, that I needed to fulfill appetites of men. It didn't need to necessarily be pretty... but it had to be filling. Shannon, Todd's aunt,  has five growing boys... six if you count her husband Woody. Then there is Todd and his uncle Tim... and let's face it, guys like guy food, not chicky stuff. So, I compromised. A few "man food" for the boys... and a few cutesy appetizers for us girls. Even though these were cute... the flavor was wonderful and the boys liked them too!

I must admit, this was the easiest appetizer I have every made!  No joke.

Cucumber Bites with Garlic Herb Filling
Makes: About 36 Cucumber Bites

Ingredients:
1 (5.2 oz) Package Garlic Herb Boursin Cheese*
4-5 Tablespoons Heavy Cream
Salt and pepper to taste
2-3 English Cucumbers, partially peeled. 

Directions: 
Clean and partially peel your cucumbers with a vegetable peeler. Cut into 1-inch thick slices. With the small end of a melon baller, remove enough of the cucumber to leave a small hollowed out area for the filling to sit. Salt and pepper each cucumber to your liking. Arrange these on your serving and tray and set aside.

In a small bowl, mix boursin cheese and heavy creamy until a consistency that can easily be piped. Transfer to a pastry bag and set aside. 

Pipe a small amount of cheese mixture into each cucumber. Chill until you are ready to serve. 


*Note: I can't help but thinking how good this recipe would be with blue cheese in place of the boursin. The extra pop of flavor is enchanting. I think I will try this next time. If you try it before me, please let me know your results!

Source: Modified in the tiniest way from this original @ Annie's Eats.

Happy Monday!
Kristen

Friday, May 4, 2012

Peanut Butter Chocolate Chunk Cookies

I don't usually keep cookies in my house for two reasons: 
1. Todd will eat all of them. (This is really not a huge deal, but he is diabetic and I feel slightly guilty when I place a large vat of cookies in front of him knowing full well that they are his weakness.)

2. I will eat them. The only time I don't want to eat an entire plate of cookies is when they are from some grocer deli and are rather disgusting OR when the taste testing proves them to be "just okay."

That is not the case with these cookies. These cookies are not for the faint hearted average cookie liker and they are more than "just okay." They are phenomenal! These peanut-buttery, soft and chewy chocolatey pieces of heaven will change your life. (Okay, maybe not, but they are quite delicious!)

Make up a batch of these for the cookie connoisseur in your house. I guarantee they will fall in love.

Peanut Butter Chocolate Chunk Cookies
Makes: About 3 dozen

Ingredients:
1 1/4 cups all-purpose flour
3/4 teaspoon baking soda
1/2 teaspoon baking powder
1/4 teaspoon salt
1/2 cup unsalted butter, softened
1 cup peanut butter at room temperature (smooth or chunky, your preference)
3/4 cup sugar
1/2 cup firmly packed light brown sugar
1 large egg, at room temperature
1 tablespoon milk
1 teaspoon vanilla extract
3/4 cup white chocolate chips
3/4 cup milk chocolate chips
For sprinkling: 1 tablespoon sugar, regular or superfine

Directions:
Preheat oven to 350 degrees. In a large bowl, combine the flour, the baking soda, the baking powder, and the salt. Set aside.

In your electric mixer with the paddle attachment,  beat the butter and the peanut butter together until fluffy. Add the sugars and beat until smooth. Add the egg and mix well. Add the milk and the vanilla extract. Slowly add the flour mixture and beat thoroughly. Lastly, stir in the chocolate chips and mix for about 30 seconds.

Place sprinkling sugar, (the remaining tablespoon,) on a plate. Drop by rounded teaspoonfuls into the sugar, then onto ungreased cookie sheets, leaving several inches between for expansion. Using a fork, lightly indent with a criss-cross pattern, but do not overly flatten cookies.

Bake for 10 to 12 minutes. Do not over bake!! Cookies may appear to be underdone, but they are not. (I promise. No longer than 12 minutes.)

Cool the cookies on the sheets for 5 minute, then remove to a rack to cool completely.

Cookies will be really soft right out of the oven. If you try to move them too soon you will risk them falling apart. That wastes perfectly good cookies, so don't do that!

Have a wonderful weekend everyone!
Kristen

Source: Slightly Modified version of Smitten Kitchen's Peanut Butter Cookies

Friday, April 27, 2012

Grilled Halibut with Bleu Cheese Butter

I purchased a fancy new grill pan/pizza stone/baking stone at one of my favorite stores, Sur La Table. I had received a gift card there for my last birthday and have spent the last seven months deciphering what I would purchase with it when I came across this one and new I had to have it. I loved it's versatility. The very first day I brought it home I knew it needed to be used.

Todd threw it on the grill and I headed for the store to pick out some beautiful white fish. Have no fear if you have never cooked halibut before,  it's a cinch! The butter is even easier!
If you don't have a grilling stone, oil the grill surface and place them directly on the grill! (It will still turn out wonderful, just be cautious when flipping!)

Grilled Halibut with Bleu Cheese Butter
Serves: Four (4)

Ingredients:
Four (4) Six to Eight ounce halibut fillets
Five ounces of crumbled bleu cheese
3 Tablespoons fresh lemon juice
6 Tablespoons butter
Salt and Pepper to taste
Olive oil (for brushing halibut) 

Directions:
Brush halibut filets (on all sides) with a small amount of olive oil and sprinkle with salt and pepper.

Heat grill to medium-high heat. Place stone on grill and allow to warm-up at least 20 minutes.

Place halibut fillets onto grilling stone and close lid. Grill for 7 minutes per side or until fish is cooked through and flaky. (Note: Try to avoid turning more than once as the fish get quite soft and tends to fall apart.)

Meanwhile, on your stove-top combine butter, lemon juice, salt, pepper, and blue cheese and melt on low heat, stirring frequently.

Remove halibut from grill and plate on dinner plates. Spoon warm bleu cheese butter mixture over each fillet until gone.
That was pretty easy, wasn't it?

Enjoy and have a lovely weekend!
Kristen

Source: An original of my own!